Monster Hunter: World - 15 Best Tips & Tricks On The Internet
From secret weapon attacks to special carving techniques and more.
It is about time Monster Hunter made its mark on the West - and with sales of over five million (and counting) across just three days, it's safe to say Capcom's veteran lizard-slicer is finally getting its due across the pond.
Because for the longest time, Monster Hunter was only as large as its most fearsome foes in Japan. Entire families continue to sit down and carve through a nightly allowances of dragons and dinosaurs, yet over in America, Monster Hunter's fans have been a far smaller, more vocal bunch.
With the release of what could easily the best entry in the franchise yet, Monster Hunter: World sees Capcom take full advantage of not only the PS4 and Xbox One technology, but a curious audience dying to give the series a chance. The environments are more detailed, the monsters more fierce and the weapons way more fun to use.
Basically, this has been the version of Monster Hunter fans have played in their mind's eye since 2004 - and the one everyone else was waiting on trying out.
With more people than ever slaying the most intimidating creatures home consoles have ever seen, let's make sure you're doing it the right way...
15. Monsters Take 3x Damage While Sleeping

At some point in any hunt - providing you're not absolutely devastating a beast, killing it before it has a chance - your quarry will hightail it back to their nest.
Done so the creature can regain health or perhaps sleep, depending on the time of day, in this state they're very susceptible to damage. Three-times as much, in fact, as has been the case in past Monster Hunter games.
This is the perfect time to lay down some bombs, or charge up your most devastating group attacks as one.
Whatever that opening attack is (the one that wakes the monster up), it will do the most damage. This also marks the time you should start prepping traps if you're capturing, as the creature is likely to give up the ghost within a few more hits.
If you're going for the kill, line up your fanciest explosives and blow a sizeable hole in the side of their HP.
14. Carve Your Kills Faster
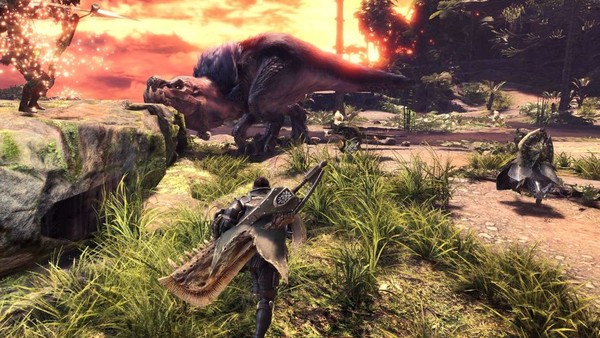
Once you've brought down a monster in any focused quest (embarking on an expedition has no time limit), there's a rush to do as much as possible in the seconds before you're automatically taken back to camp.
As such, everyone always rushes in to carve the beast, and you can speed up the process by holding down circle/B, rather than just tapping it once or repeatedly.
As you'll usually end a quest back at a monster's nest or in some other item-rich place, it frees you up to follow your Scout Flies and mine any nearby ore deposits, pillage bone piles or snag a few handfuls of mushrooms.
13. You Can Track A Monster Even If It Displays As "????"

Now, the game does tell you this right at the beginning, but it comes amidst a slew of tutorial messages and hints - ones that for any newcomer or anything less than a veteran, will be overwhelming.
Basically, you can guide your Scout Flies more than the game lets on, and even if all you've done is interact with some tracks of a creature still appearing as "????", there'll be an entry on the map screen regardless.
To tell the flies you want to track it, open the map and hover over the name in the bottom left, then click the right stick in. This will place a pin on the beast's name, and once you un-pause, you'll see your little scouts point you in the right direction.
12. The Long Sword - And Many Other Weapons - Has A Secret Attack
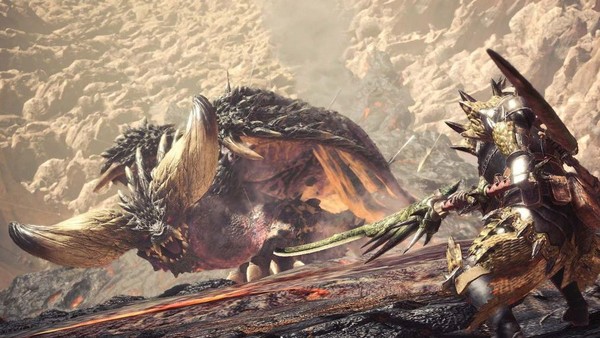
I stumbled upon this completely by accident (and shout out to any fellow Long Sword users), but MH World has a deceptively deep moveset for each weapon - with the Long Sword in particular getting one hell of an upgrade.
Basically, you want to attack a monster enough until the red Spirit Gauge in the top-left is full. From here, do a four-hit Spirit combo using just R2. It'll end with a stylish pirouette, and although the game doesn't flag anything other than putting a thicker white aura around the same gauge, you've actually entered a different mode.
Now you need to hit R2/RT+triangle/Y to do the same stab as always, but hit triangle/Y again, and you'll launch WAY up into the air, coming crashing down with a showering blow that hits a good handful of times, doing more damage than any other slash.
Experiment with other weapons and let me know down in the comments what you've found. And if you haven't finished a monster by coming flying down out of the sky using a katana... well... it's high time you did.
11. Fallen Items During Combat Are Monster Parts
It took me far, far too long to realise that you can get more monster parts than just what you carve off the beast at the end, and/or what's awarded through quest allocation.
In fact, some rarer things like Anjanath Fangs or certain species' tears will actually fall off during combat. Chances are you've seen these bright red or blue "items", potentially discarding them as just more Slinger ammo - yet they can be some of the most hard-to-come-by components in the game.
Next time the beast gets so wounded it leaves the area, take a moment to scour what's nearby. Note that only one player can pick up a fallen item like this, so it's first come, first served if you're in multiplayer.
10. How Buffs Work & Chain Together
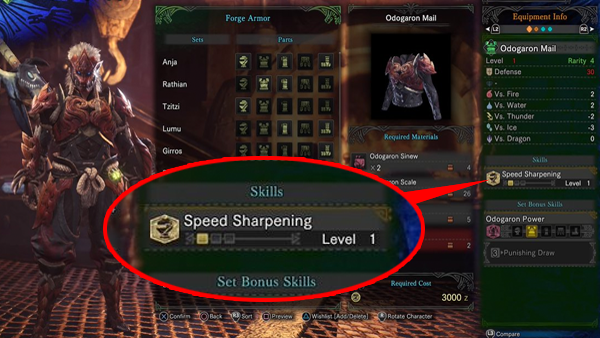
Although MH: World is pretty clear about which buffs are doing what once you bring up the Skill Info window, it's not clear whatsoever how to get past level one.
Essentially, these perks are stackable - meaning you need multiple pieces of equipment with the same skill to trigger levels 2, 3, 4 and so on.
However, at the beginning of the game, armour pieces/sets all have different skills, making them impossible to combine unless you can match one with a weapon. Yes, some creatures have species-dependant buffs if they're a set, but what gives?
The answer is ostensibly just to play more, as once you've unlocked the main Research hub (after the first Zorah battle), you'll also unlock Charms.
Charms come in all shapes and sizes, skill-wise, meaning you can craft a Thunder Charm and wear it with Thunder Attack-embued armour (likely from a Tobi-Kadachi), to get a Level 2 Thunder Attack bonus. These stack from anything that has the same Skill description, so combine a weapon, piece(s) of armour and a charm, and you've got one hell of a powerful Hunter.
9. The Benefit Of Mounting A Monster
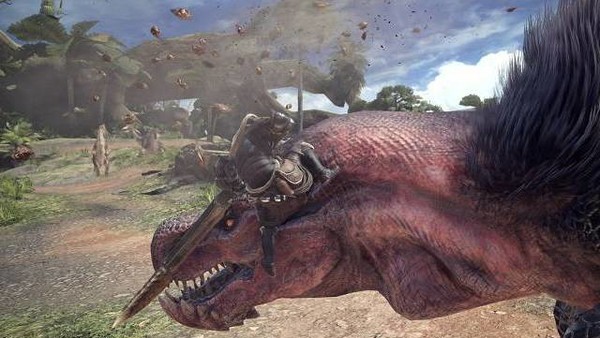
There is one reason and one reason only to mounting a beast: Downing them.
I mean yes, it looks badass to latch onto some flying Rathalos and get carried up into the sky, furiously stabbing as you go, but hang on long enough and you'll trigger an animation that brings them to the ground.
Take note of when the buttons in the top right are lighting up (if you haven't turned the HUD off), as then you'll know when to press the attack or hang on for dear life.
Downing the beast can prevent it from running away to heal, essentially keeping the pressure on and netting you a better chunk of items faster. Also use the analogue stick while mounted to attack the head, body and tail of creatures, denoting which parts will drop during and after battle.
8. The Minimap: What The Numbers & Different Aura Colours Mean
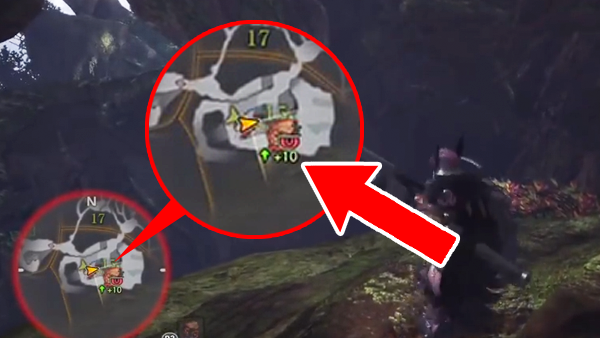
Another one for during the hunt: Just what the hell do the little "+20" or "-35" numbers mean?
Strangely for something that's integral to you track them, these numbers refer to a monster's elevation in relation to you. A "plus X" value means the creature is above your position, whereas negative is below.
Also be aware of what colour the minimap's surrounding aura is. Basic grey means everything is normal, red means you're being targeted by a creature/you've aggravated something, and purple either means you've been poisoned, or are currently evading a beast's line of sight.
For the latter, use bushes/shrubbery or don the Ghillie Mantle to essentially disappear from sight temporarily. Different monsters are better than others at tracking in this state - just make sure you stay out an Anjanath's way when it starts sniffing the ground.
7. Learn Which Monster Parts You Should Carve Off In Battle

Although it is barely covered in the tutorial, there is a sweet science to exactly where you should attack a creature - be it head, body, tail, wing etc.
It denotes which parts are likely to drop, but also means you can affect some creatures' most devastating attacks. You can actually disable things like a tail-whip or fire breath if you focus on tails/throats respectively. Their health pools are far smaller than the body of the beasts', and there's also nothing quite so satisfying as braining a feral creature with a hammer the size of a car.
Different weapons have their uses here too, and you should use blunt ones like Hammers and Hunting Horns to daze the creature by targeting the head, essentially breaking their faces if you want specific fangs. Listen out for a "crash/coin payout" noise, to know you're hitting the right spot.
Sharp blades like Long Swords and Dual Swords can focus their attention on tails and wings, too. Basically, if any body part is instrumental to a creature's attack pattern, cut it off or disable it.
6. Why Can't I Use X Ammo/Coating?

Simplified in comparison to past Monster Hunters, the exact uses of ammo and coatings is still likely to confuse, as they show up in the Item Box with a whopping great red "X" overtop.
This simply means that your current weapon isn't compatible with that ammo type, but even if you have a Bow and a particular coating is still crossed out, then what?
It means that particular Bow isn't equipped to handle that type of coating, and you'll need to visit the Smithee to purchase an upgraded version, or upgrade your existing weapon until it can. Pay attention to the bottom right ammo/coating list when hovering over any new Bow or Gun, as this will tell you which ammo types are going to be compatible in the field.
Even after this, once you're back in the map, you'll need to ensure each ammo type is in your ammo pouch, then use up and down on the D-pad to select them.
Phew.
5. Always Load Your Slinger
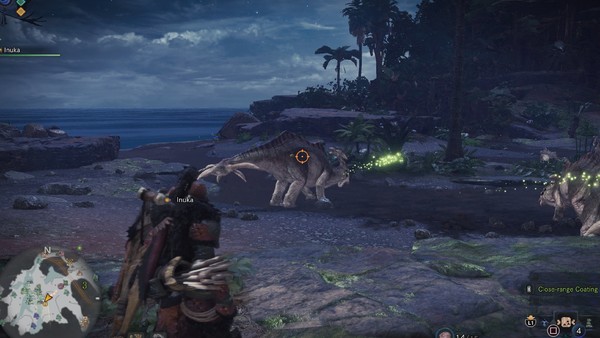
This is so simple... Capcom didn't include it as part of the tutorial. You'll see your main character utilising the Slinger during cutscenes, most likely wondering how the hell you're supposed to fire anything other than dung and stones.
The answer is you have to equip Slinger ammo like anything else. Be it poisoned throwing blades you can craft or just explosive Redpit projectiles, flick to these in your item pouch by holding L1/LB plus Circle/B or Square/X, then press Square/X to load your equipment.
Note: Picking up any other Slinger ammo will overwrite your selection, and though this can be useful if you want to grab something and shoot a monster to stagger or interrupt its animations, sometimes you'll want to prioritise poison damage or a stunning flash.
Keep an eye on what's in your Slinger pouch, and keep it topped up with what's going to help the most.
4. The Environment Can Help Trap/Damage A Monster
You might have noticed your little Palico pal bringing you health boosts during a fight - and these come from nearby floating "sacks" of... juice, called Vigorwasps. While extremely beneficial, they tap into a mentality you need to adopt while on the hunt: Using your surroundings to your advantage.
Be on the lookout for areas that harbor Flashflies, for example, and trigger them to blind a beast if they're nearby. There are many toads that can be kicked to explode after a short few second delay too, and the likes of Nitrotoads can deal huge, explosive damage when used right.
Lastly, Poisoncups can inflict lasting, draining damage over a large radius - so keep these in mind if you're caught between a group of enemies and want to affect all of them at once.
Also note that many of these explosions will affect you too - specifically the status ailment ones like sleep or paralysis (seen above). However, if you happen to get hit during the "I'm so sleepy/wounded" animation, it'll helpfully jolt you back out again.
Use this to your advantage when against groups of foes as when they're all closing in, you can sometimes make it out in one piece, dealing group damage and escaping in one go.
3. Inventory Shortcuts: Hold X To Claim Rewards Faster & Use The Shoulder Buttons
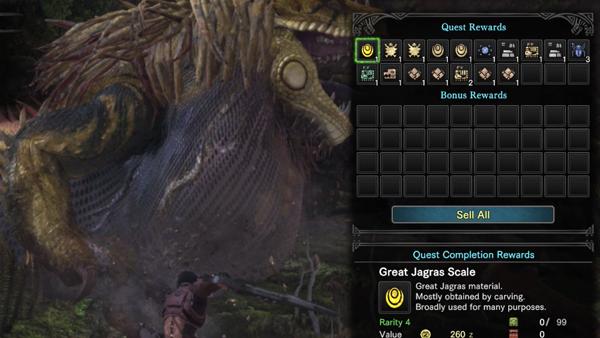
For the love of God, DO NOT "SELL ALL".
Why on Earth the game defaults to "Hey, do you want to sell all the monster parts you just worked hard to acquire?" is beyond me, but it does.
To remedy this, note that if you hold X/A over that first tile instead, the game will start an "auto-banking" mechanic - one that providing you keep the button held down, rockets through everything you just acquired and sends it back to your Item Box.
Much better.
Also be aware that you can use the shoulders buttons when in the Item Box menu to group-store anything, as well as removing items in batches. If you don't want to click the left stick to hop between your Pouch and Box, use R1/RB to move all of what you're highlighting at once, or hit R2/RT to discard instead.
2. Resource Quests, Taking Less Damage & How To Check In-Game
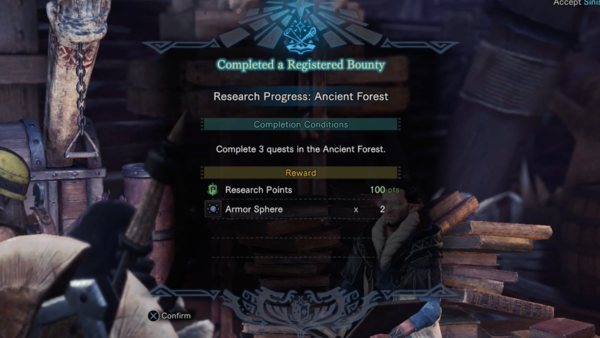
So, you've got your head around hunting and weapon handling - but you won't really stand a chance against the biggest beasts in the kingdom until you've ranked up your armour. And that, takes Armor Spheres.
Thankfully, they're far easier to farm in World than any past Monster Hunter - requiring you to complete Bounties for the Resource Centre. These can range from "Draw Honey 5 times" to "Slay 20 small monsters", and upon completion, you'll nearly always get a Sphere, which can then be taken to the Smithee and used to upgrade armour.
All that said, you might be thinking that after accepting the quests, it's up to you to remember them.
Not so.
Hit pause and navigate to the "Quests" tab - then down to "Resource Center > Bounties" and you can view an up-to-date tracker of everything you've killed/picked up, alongside how close to completion you are.
I recommend deviating away from the main body of quests and embarking on an Expedition (by walking out any hub world's gate), then spending time doing the pleasantries of gathering mushrooms, killing small monsters etc.
Besides being therapeutic, the resulting Armor Spheres will rank you up considerably once you've cashed them back in.
1. Unlock The Horizon Zero Dawn Gear (On PS4)
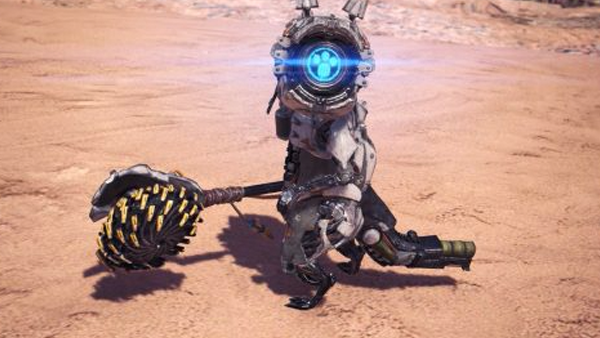
Finally, a supremely cool costume set that only just went live with the game itself.
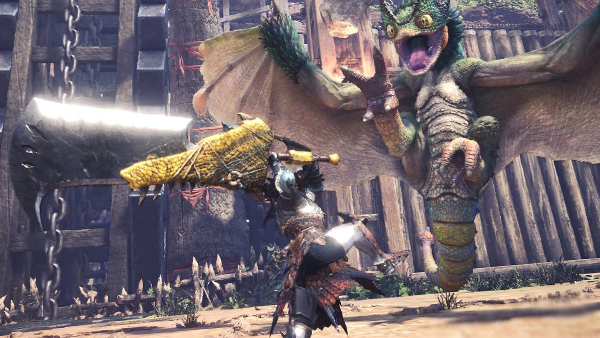
To acquire the Horizon Zero Dawn gear - of which the Watcher Palicoe set is just phenomenal - you need to either post or join the "Event" called "The Lessons of the Wild", where you'll face off against multiple Barnos and one stun-happy Tzitzi-Ya-Ku.
Simply kill eight of the Barnos (the Ya-Ku's stun-blast can help down them) and you'll get a "Watcher Lens" to craft with. Mix two of these with five Dragonite Ores, and the costume is yours.
At time of writing, only the Watcher set is available (until February 8th), but Aloy's armour and bow will be coming shortly after.